

How to setup GNS3 on a remote server


Step Zero : Requirements
- An AWS account
- A local GNS3 installation
- A local OpenVPN installation
- A SSH client of your choice
DISCLAIMER: I've made this tutorial using linux.
Step 1 : Launch an EC2 instance
Launch a Linux instance:
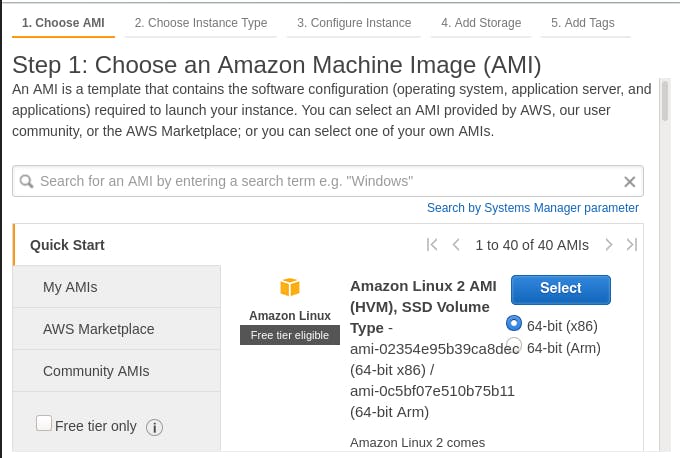
- Navigate to EC2 in the AWS Console.
- Click Launch Instance.
- Select a free-tier eligible Ubuntu image.
- Click Next - leave the Instance Type panel as is.
- Click Next - leave the Instance Details panel as is.
- Click Next - leave the Storage panel as is.
- Click Add Tag. Set key to Name and value to the name you choose to your instance. (Optional step)
- Click Next.
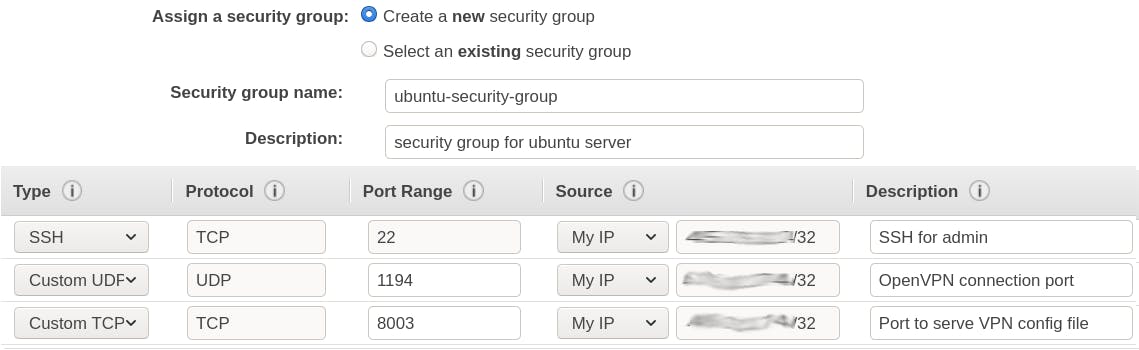
Create a Security Group:
- Assign a security group: Create a new security group
- Set the security group name and description as you choose.
- SSH connection for admin
- Type: SSH
- Protocol: TCP
- Port Range: 22
- Source: My IP
- Description: (optional)
- OpenVPN connection port
- Type: Custom UDP
- Protocol: UDP
- Port Range: 1194
- Source: My IP
- Description: (optional)
- Port to serve VPN config file
- Type: Custom TCP
- Protocol: TCP
- Port Range: 8003
- Source: My IP
- Description: (optional)
- Click Review and Launch.
- Click Launch.
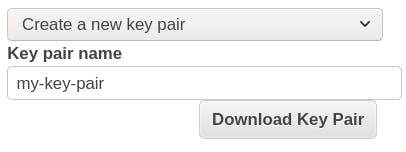
Create a Key Pair:
- Select: Create a new key pair
- Set the key pair name as you choose.
- Click Download Key Pair
- Click Launch Instances
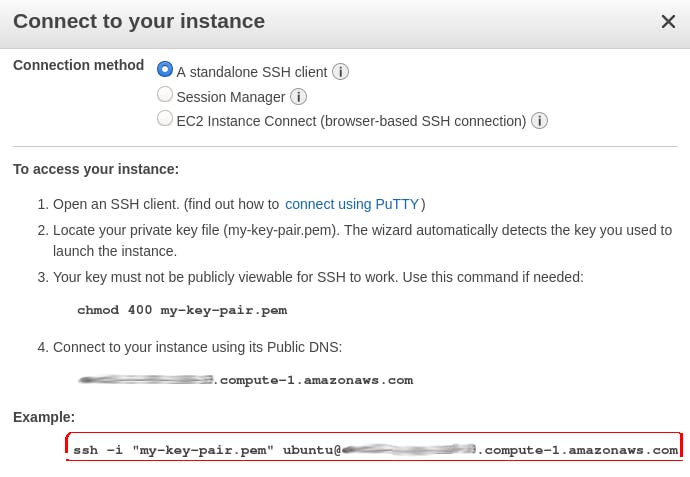
Connect to instance:
- Back to EC2 Instances panel in the AWS Console.
- Select the instance.
- Click Connect.
- Connection method: A standalone SSH client
- Change the keypair file permissions to Only Owner Read/Write as follows:
chmod 400 my-key-pair.pem
Or, if you are using Windows:
- [File] Properties - Security - Advanced
- Set Owner to the key's user
- Remove all users, groups, and services, except for the key's user, under Permission Entries
- Set key's user to Full Control
At the SSH client of your choice, input the details provided.
- User name ubuntu
- Target: Public DNS
Example:
ssh -i my-key-pair.pem ubuntu@server-public-dns
Step 2 : Install OpenVPN and GNS3 on the instance
Download/Install GNS3:
- Inside the server:
sudo su - Install the GNS3 as instructed by the Installation Guide
cd /tmp
curl https://raw.githubusercontent.com/GNS3/gns3-server/master/scripts/remote-install.sh > gns3-remote-install.sh
bash gns3-remote-install.sh --with-openvpn --with-iou --with-i386-repository
- Restart the server for the installation to take effect:
reboot now
Step 3 : Config your OpenVPN client and open the VPN tunnel
Config OpenVPN client:
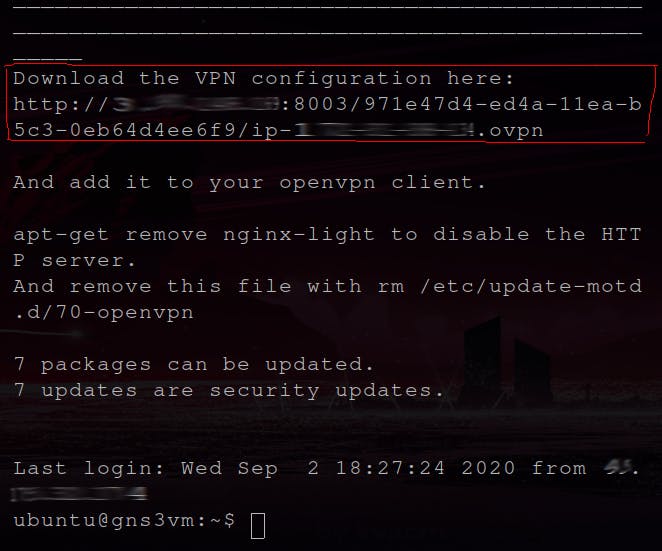
SSH back to the server, copy and download the config file provided by the OpenVPN server to your local machine.
Run OpenVPN client:
At your local machine, run OpenVPN client using the file dowloaded:
sudo openvpn config-file.ovpn
Step 5 : Config your GNS3 client
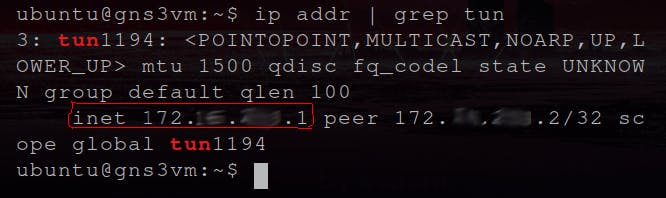
Find the tunnel IP address; at the server:
ip addr | grep tun
- ip addr list all the IP addresses.
- grep tun filters the result of 'ip addr' and shows only the records with 'tun' (as in tunnel) in it.
Config remote main server:
- Open your local GNS3 client.
- Click Edit; Preferences; Server
- Uncheck "Enable local server"
- Host: the tunnel IP address
- Port: 3080

Step 6 : Enjoy!
Now you have the GNS3 installed and ready to go!

Step 7 : But before you go... save your work!(and some money)
Don't leave your instance running without any purpose. Save your instance (all configured and tweaked) to use it whenever you're up to lab again.
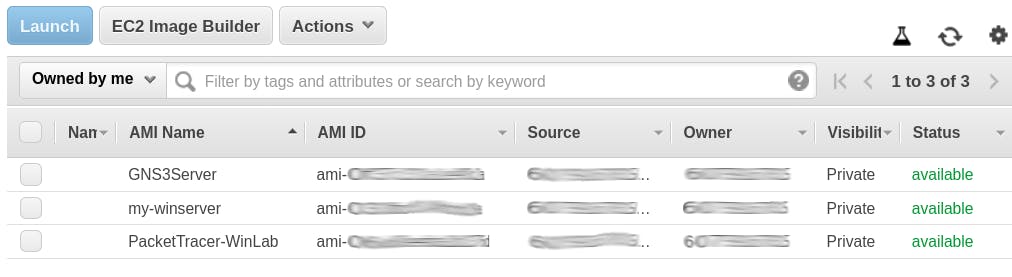
Create an AMI:
- Back to EC2 Instances panel in the AWS Console.
- Select the instance.
- Click Actions; Image; Create Image
Your AMIs will be available on the EC2 Images panel in the AWS Console.
Don't forget to terminate your instance!
- Back to EC2 Instances panel in the AWS Console.
- Select the instance.
- Click Actions; Instance State; Terminate
- Click Yes, Terminate